|
Assign Elevation
This is handy little routine for quickly assigning elevations (z value) to multiple contours in AutoCAD. ideal for assigning elevation to contours obtained from digitizing or scanned vectors. Allows the user to "stair step" up or down the slope assigning the elevation. Pick the base elevation, set the contour interval, and specify up or down, and you're on your way. Contour highlighting is used to assist the user keeping track of current location, and also allowing the user to see any breaks in the contour.
|
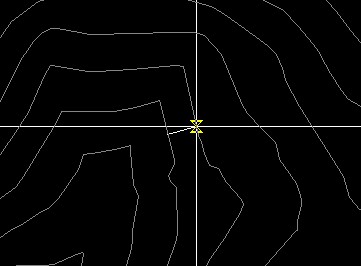
Enter the starting contour elevation, or use the "..." button to select a contour, it's current elevation will be displayed as the default. Then specify the contour interval, and whether up or down a slope. once again, you can use the "..." button to select from the drawing. If you have another portion of the map which has already has been set to elevation, you may select the contour interval and slope direction by picking two adjacent contours (as shown below).
Hit the [proceed] button to continue picking each contour (in order) going up/down a slope. Each contour will highlight allowing the user to maintain position, and see any disconnected segments from the polyline contour.
When done, (or change parameters, such as slope direction) hit [enter] to return to dialog box. you can also choose from color highlighting, AutoCAD's highlight, or no highlighting. |


Version Information
| Program Name: | Assign Elevation |
| Application Type: | Plug-in and VBA |
| Distribution Format: | ZIP file (541 kb) |
| Last Updated: | April 7, 2012 |
| AutoCAD Version: | AutoCAD 2000 or later * |
| Current Version: | 2.0 |
* VBA version included for AutoCAD 2009 (and earlier)
 |
|
Download Now... |
|
 |
|
Only $5.95 u.s. |
|
 Compatible
This download contains a .NET compiled DLL plug-in specifically designed for AutoCAD. The demand load feature allows Assign Elevation to automatically load every time AutoCAD starts, making it a easy to use addition to the normal AutoCAD command set. Installation is a breeze using a windows setup program. This download also contains a VBA version (for AutoCAD 2006 and earlier). The use of AutoCAD plug-ins requires workstation adiminstrative privliges.
| Questions or problems regarding this web site should be directed to Webmaster@CADmentor.com Copyright © 2001-2020 Mark R. Juneau. All rights reserved. |
| AutoCAD
is a registered trademark of AutoDesk, Inc. All other products mentioned are registered trademarks or trademarks of their respective companies. |